
Cracking the Code of the Datadog App Builder

Maybe this is just a me thing, but the whole “low-code” thing that's become prevalent over the past few years hurts my brain a bit. It could be because I’ve been writing code for a long time and the drag-and-drop nature of low-code platforms feels restrictive.
But you know what’s even more restrictive? The fact that I absolutely suck at (and admittedly fear) JavaScript. As much as I love a terminal and a CLI script, realistically a lot of people are going to want a UI and like…buttons and stuff. So with an increasing need for some use cases for a UI, my distinct resistance to learning 19 various JS frameworks, and the Datadog App Builder being available, there’s a clear need to get into using the App Builder. At least I only need to know vanilla JavaScript…
Spoiler: I didn’t want to like it
I’ve spent a good amount of time recently working in the App Builder, understanding its capabilities, and how some of it works. While there are a lot of examples in the form of blueprints that are provided by Datadog, figuring out how some more of the functionality really works has been tricky, since the documentation is still a work in progress. So, I did some of the hard parts, so you don’t have to! This is meant to be a “starter guide” to the app builder with the hope that it accelerates your use of it with some of the basics.
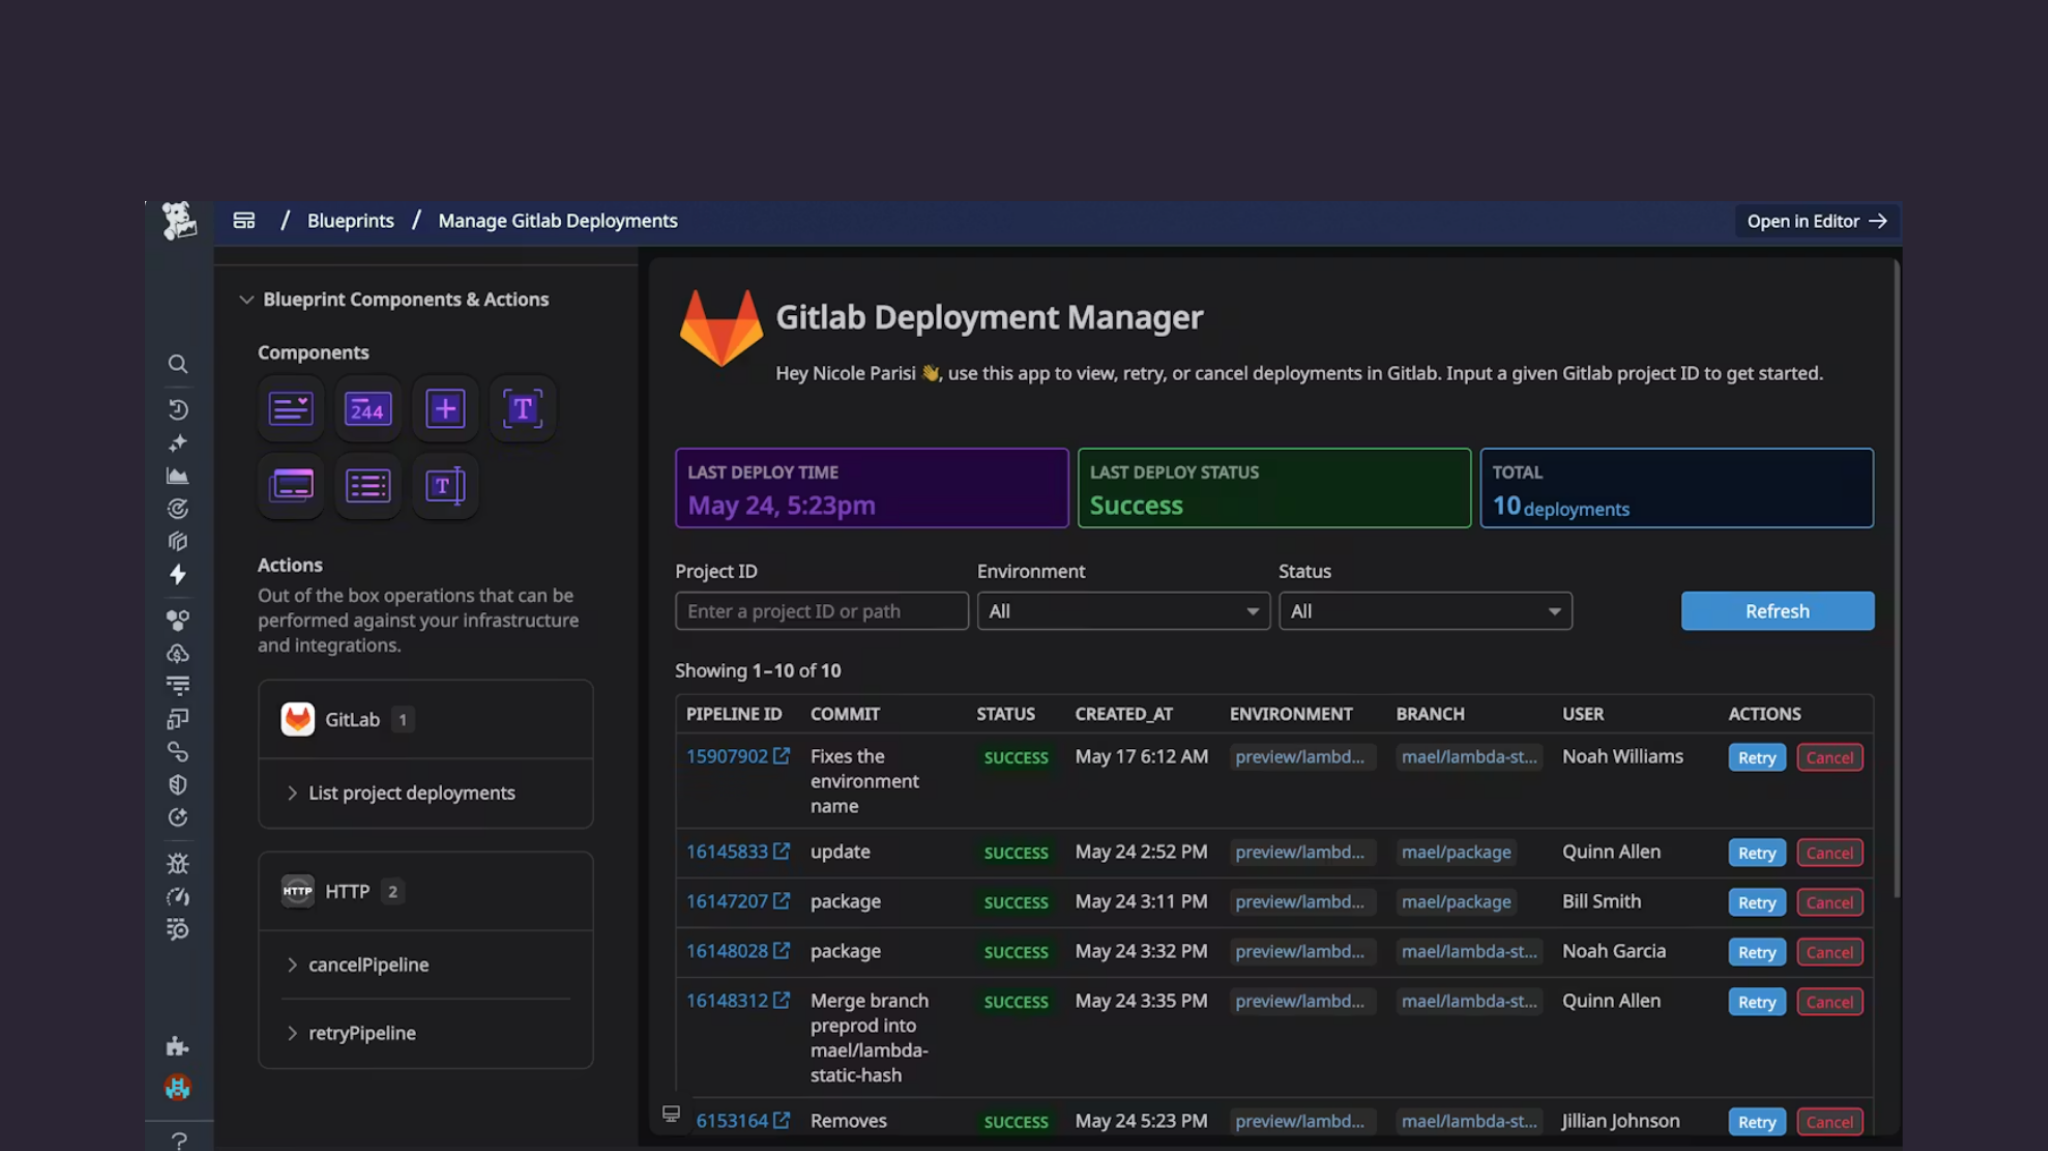
For the sake of this example, I built a little request inspector that operates against the echo webserver found at https://echo.free.beeceptor.com. That said, the first thing we should probably do is make a request against it. To do so, create an Action that is an HTTP connection type. You’ll be presented with a modal that looks like this
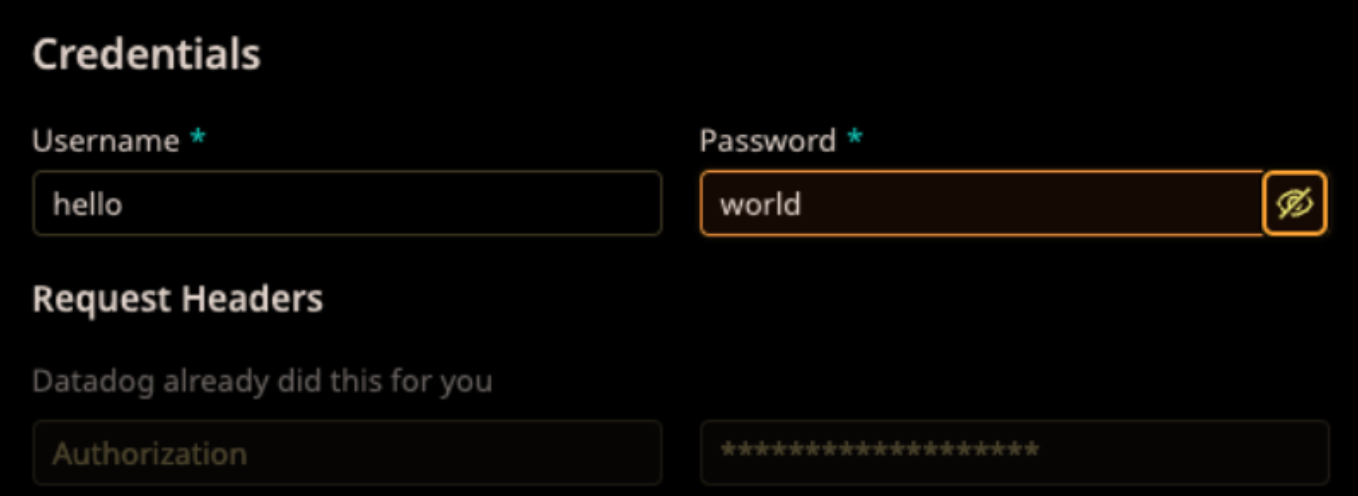
Name your connection to be something clear, add in the base URL, and then select your auth type. While this particular site doesn’t require authentication, this connection type does require some value to be put in here, so to satisfy it I used Basic Auth and hello world as my username password. That’s also my bank account login, so have fun. Clicking Confirm Access will then prompt you to select who in your Datadog Org will have access to this connection, which we don’t need to care about in this example, so we just gave it to everyone. Now…if this were an AWS connection that had write abilities? You should probably restrict that.
Ok so now we have the ability to actually make a request. If you click the green Run button, it will send the request and you can then see the response
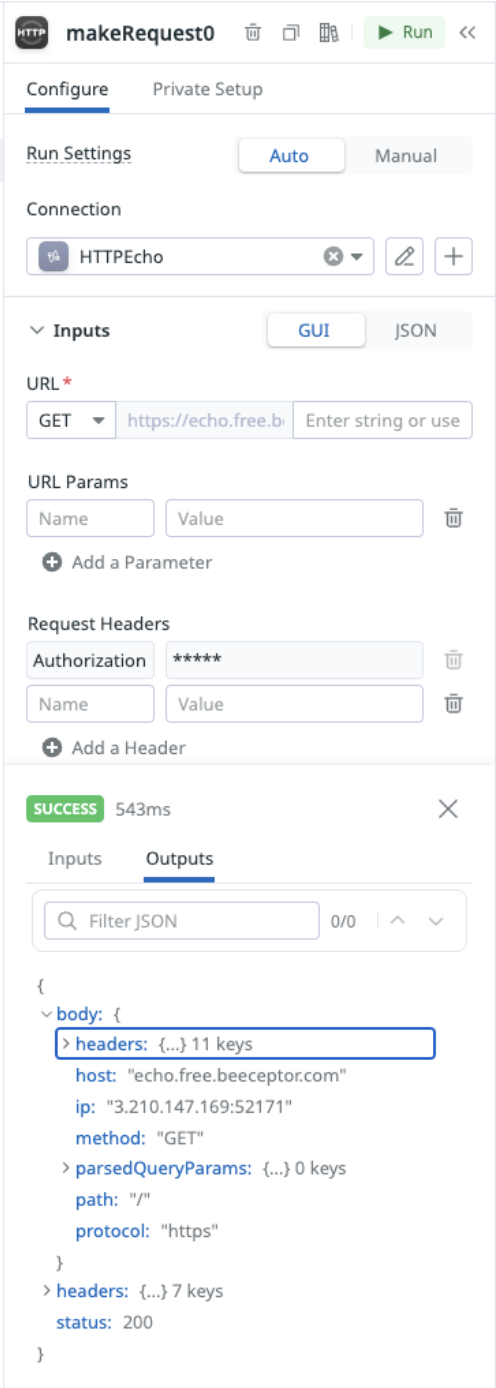
Cool! But totally useless for now!
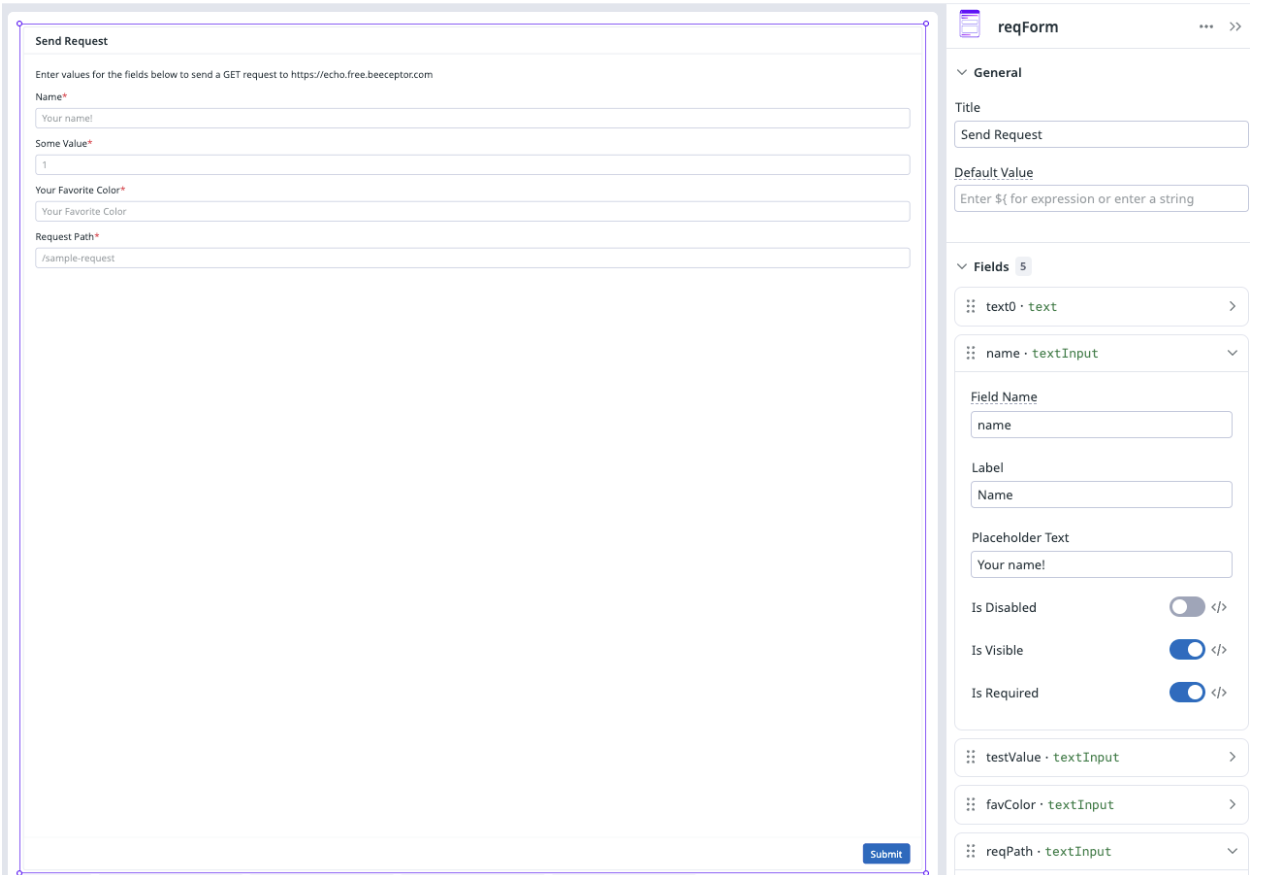
Let’s make it a bit more interesting. Add a new Component, and select Form. We can now configure this form with the options we would like to submit in our request. The parameters and endpoint for the beeceptor echo server are totally arbitrary, so I just picked a few things. Now, you can add all of the fields you want and stuff, but clicking submit still isn’t going to do anything. Let’s fix that.
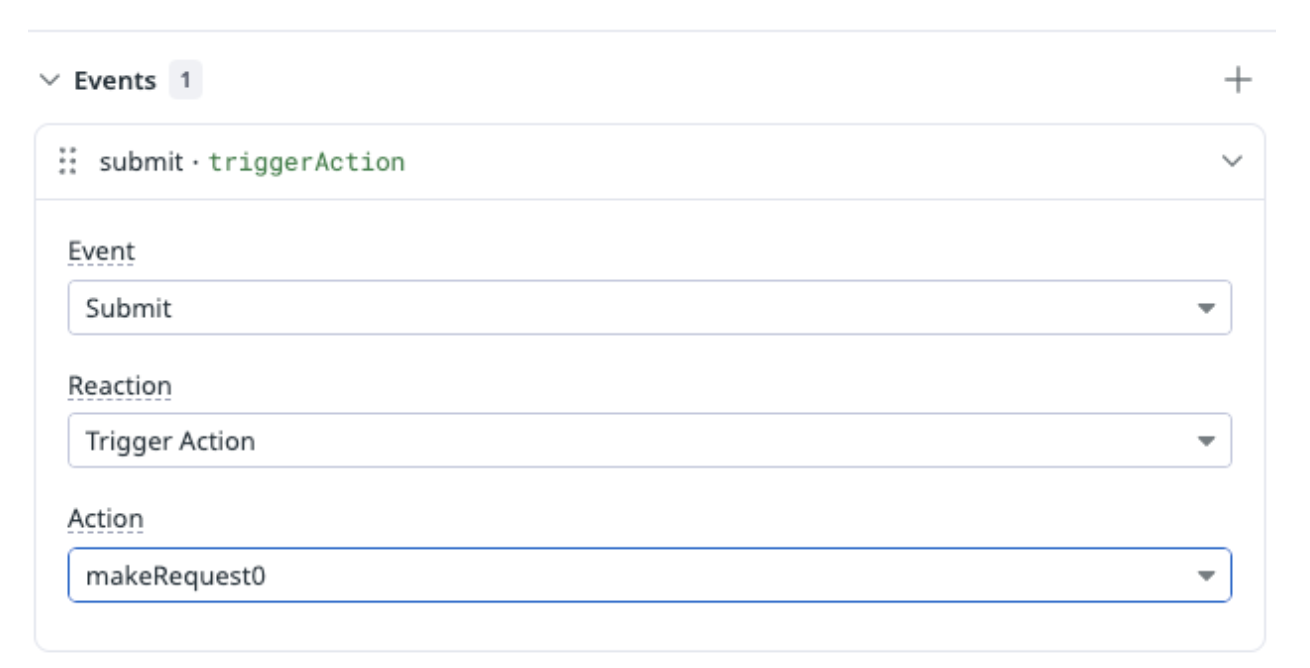
In the Form configuration section, you will find an “Events” section. You can now choose from several options, but what we want is to trigger our HTTP request action when the Submit button is clicked. So all we need to do is is assign the submit button to trigger an action, with the action being our request. But wait, there’s more!
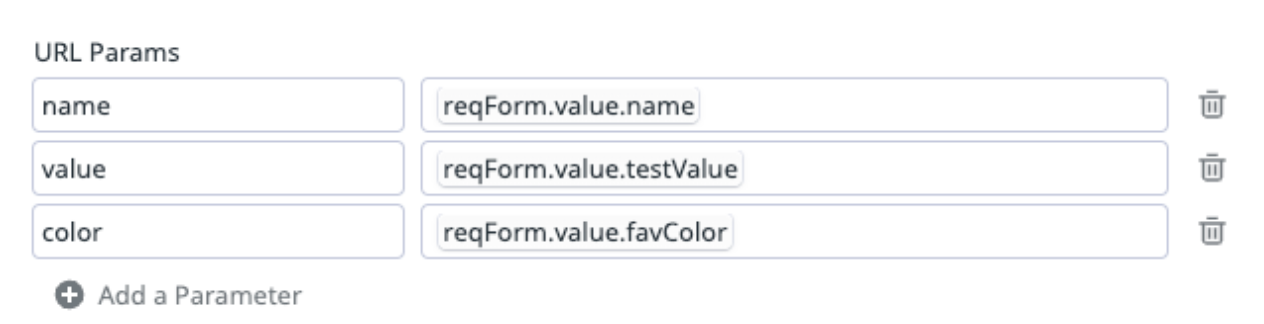
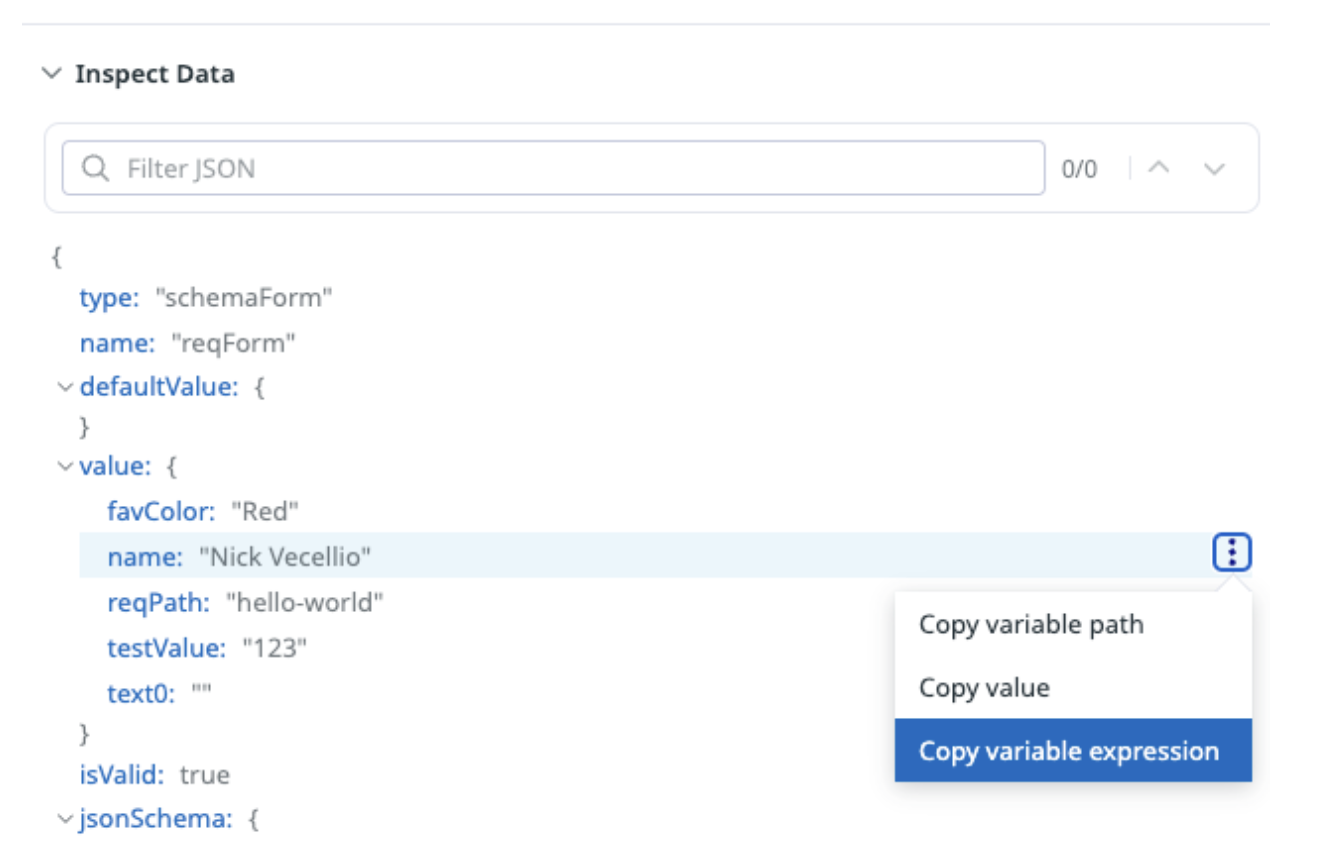
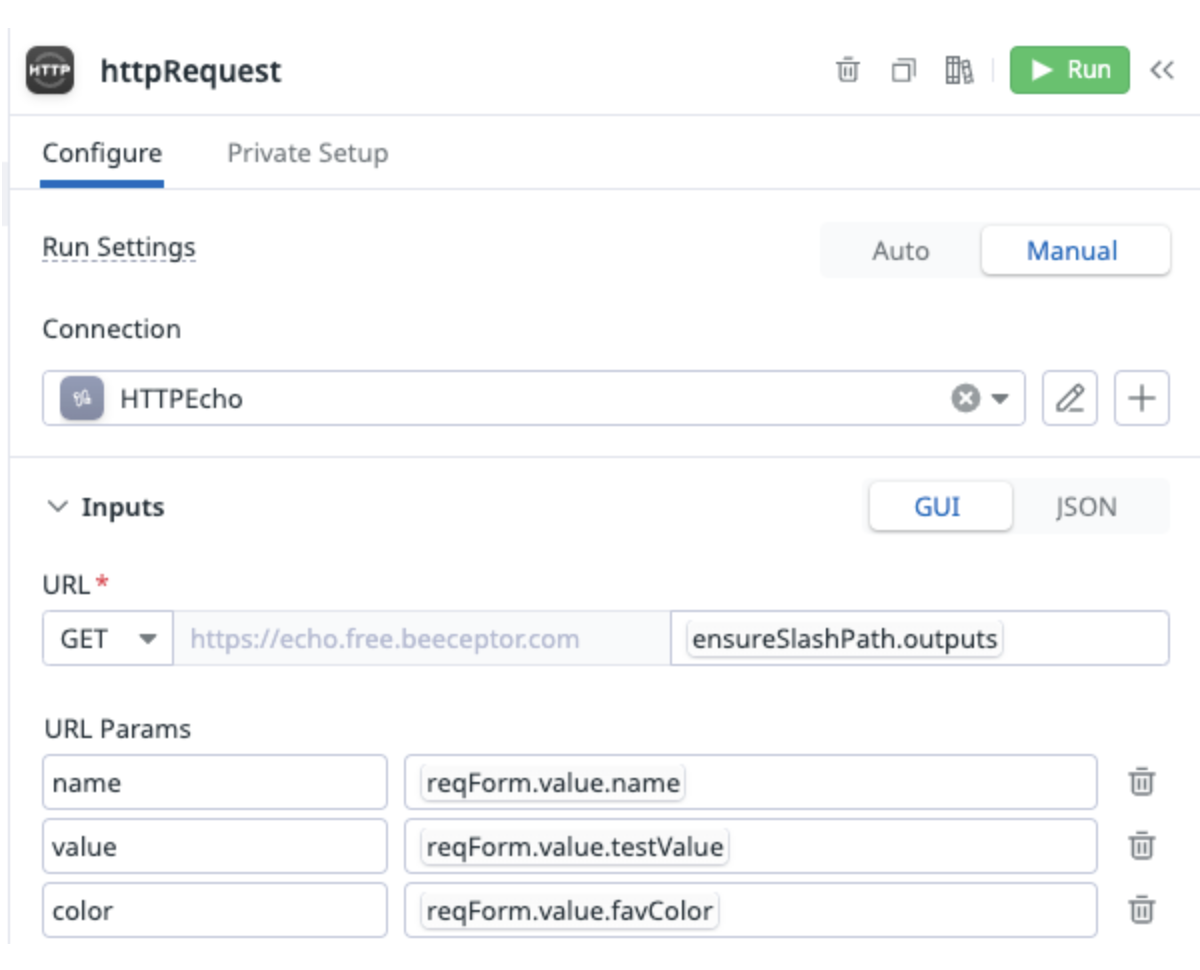
In the Request action itself, we can utilize values from that form as part of our request, using the expression formats. Now, these values are currently formatted, but when you type these in, it would look like “${reqForm.value.name}”. The “reqForm” part references our Form component, “value” references the values of the Form as an object, and “name” is the value we actually want to reference. If you need to know what these paths actually are, if you click your Form and scroll down to the bottom of the config, there’s an “Inspect Data” section that will give you your paths. You can even copy the variable expression right from here!
Now, we can easily pass these parameters, but we also included the request path that we want to hit. While this is an echo server and we can use whatever path we want, imagine that we were making this request against a real API. Something that might happen when a user enters a value is a missing forward slash, or, if we had put in the forward slash into our request action, there might be two and it would make an invalid request. How do we prevent user error in this case? We can utilize a Data Transform with some simple code to do this.
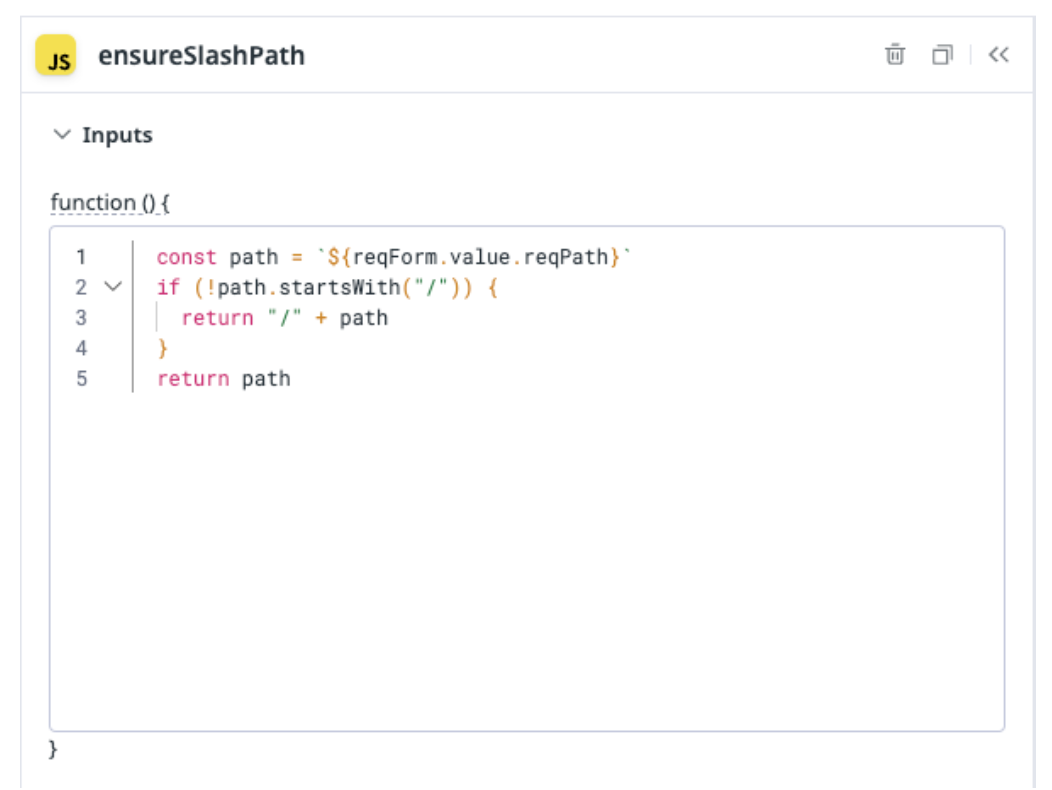
This simply reads the form field, checks if it has a slash, and adds one if not. We then call this in our HTTP Request function via ${ensureSlashPath.outputs} as the url path.
JavaScript? Still terrible. But I got it working.
With all of that in place, we can finally make our request (slash or not). But what do we do with the information? We can think about how we want to present it first of all - and in this case since it’s a request inspection, we’ll want to see request and response headers, the path, response time, etc. The best way to do most of this will be with a table, but the table component expects an array of objects, whereas the http response is just nested json, so we’ll need to do some processing.
Remember how earlier I said that I was scared of (and bad at) JavaScript? Good, this is the part where you don’t judge me.
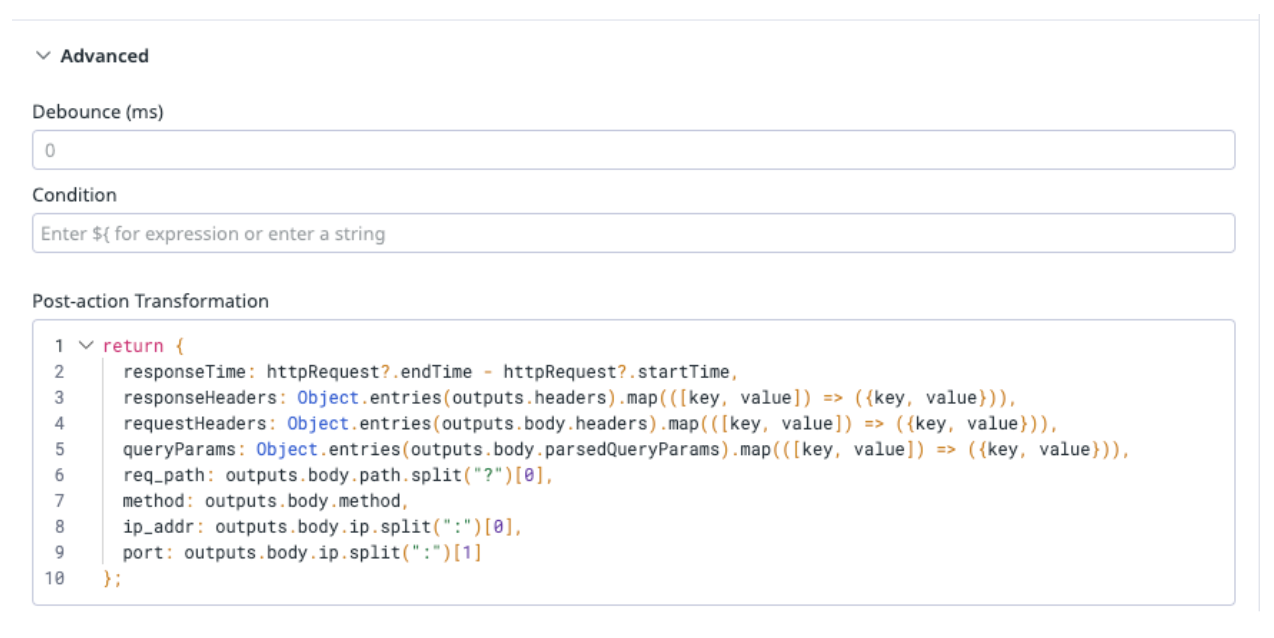
Part of the capabilities of the App Builder is a Post-action Transformation, where we can use JavaScript to manipulate the outputs of the request. In order to return the data in the format I need, I wrote a little snippet to process the data. It is still an object, but the keys contain either just values, or an array of objects. We can use these independently in various components on the other side.
Data on the screen, like I meant to do it
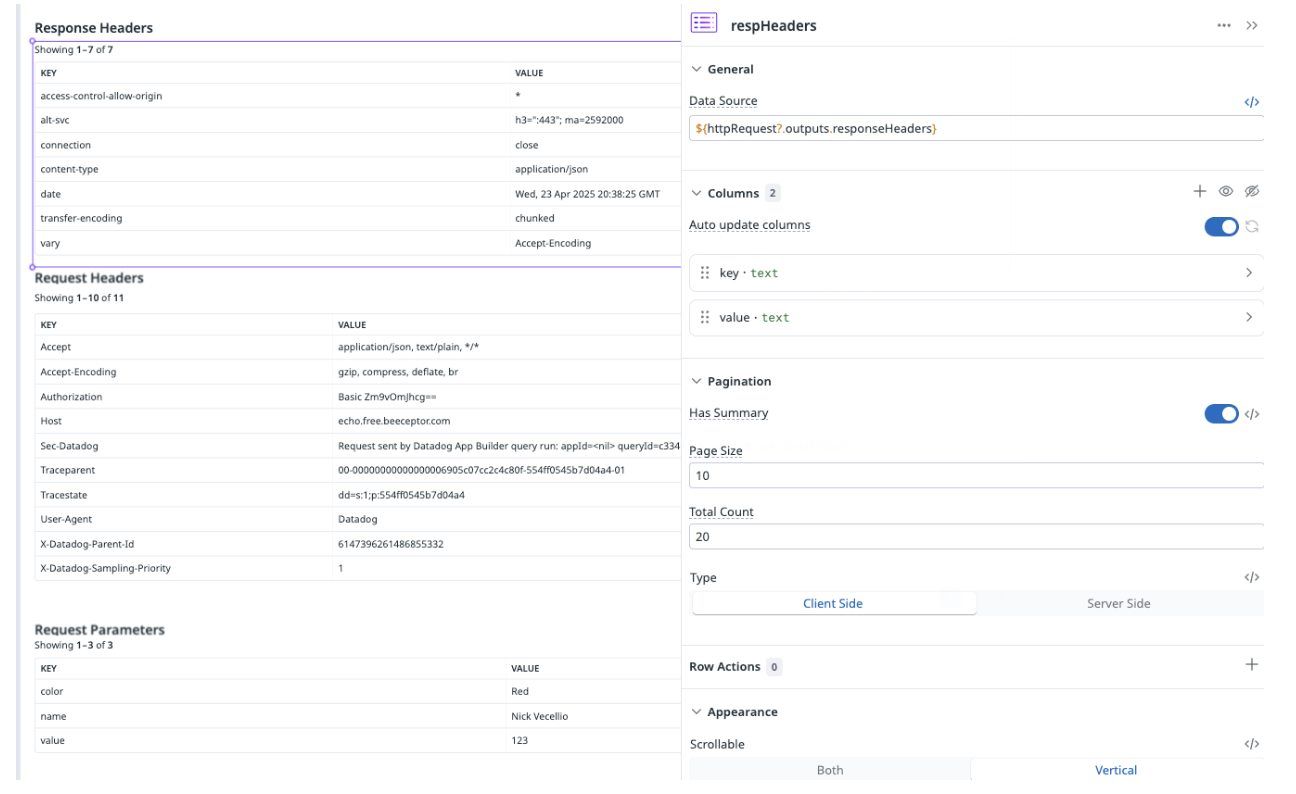
To display these values, I’m using a mix of Callout Value components and Tables.


We use another expression calling the output value for the key of responseTime from the httpRequest action, change the unit, and then we have data! We do the same for the rest of the Callout Values with their corresponding output keys.
We then do something very similar with multiple Tables, using the httpRequest outputs to populate them. Since it is an array of objects, each array element represents a row, and the key/value pairs in the object represent the columns.
With this all wired up together, we have our very simple request inspection app and we can publish this and utilize it within the App platform or add it to a Dashboard.
This app doesn’t matter. What we learn from it does.
Now is this of any particular value? This specifically? No. But that’s not the point now, is it? We just successfully built a small app and learned a few of the fundamental components of the Datadog App Builder along the way. Given these capabilities, there is a lot more that we can do as we’ve truly only scratched the surface.
We have already been using the Datadog App Builder in other ways for our customers - we’ve created an app that will show CloudFormation stack statuses and their drift, created various ways to display data in Datadog that are otherwise not currently supported, and are currently working on a few other interesting items (that I’m sure we’ll blog about as well that may or may not involve ordering pizzas).
Want some help with the Datadog App Builder? You know where to go!